


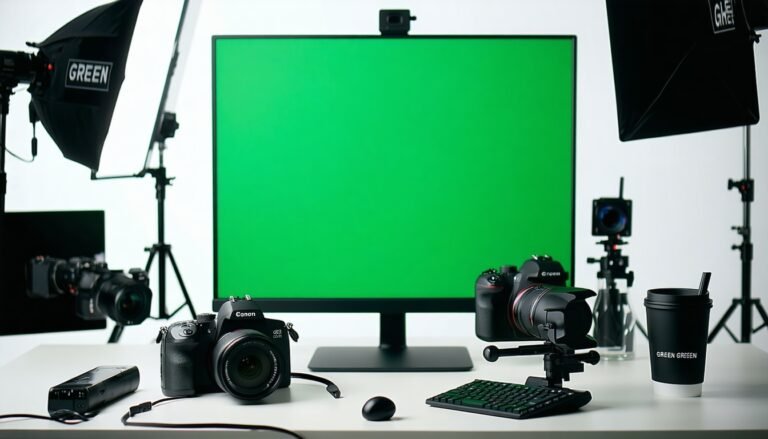
Explore green screen fundamentals.
If you’re starting, you might be wondering how to get the best green screen keying software for consistently clean composites. Understanding the fundamentals of technique and software tools is crucial before diving into the details. Green screening (also known as chroma keying) is the process of removing a single-colored background, usually green or blue, so that you can replace it with any backdrop of your choice. Mastering it unlocks a world of possibilities, from cinematic special effects to fun YouTube content.
Green screen keying isn’t only about software, though. Properly lit footage can save you hours of frustration in post-production. If you need help perfecting your setup, you can check out our quick green screen lighting setup guide later. However, for now, let’s discuss selecting the right tool for the job.
Consider core selection factors.
Before you choose any software, it’s smart to consider:
- Budget: Are you open to subscription-based tools or prefer a one-time purchase? Some professional-grade software can seem pricey, but it often comes with powerful features.
- Learning curve: Harder doesn’t always mean better. It’s helpful to pick something that meets your skill level, then gradually work up to more advanced capabilities.
- Platform: Make sure your software is compatible with your computer’s operating system. Not all tools are compatible with both Windows and macOS, for example.
- Community and Support: Online resources, tutorials, and forums can significantly impact your learning experience. If you’re a beginner, look for software that offers extensive training materials.
By focusing on these factors, you’ll narrow down your options and avoid wasted time or money on a program that doesn’t fit your workflow.
Discover top software choices.
There are numerous keying solutions available, each with its own advantages and disadvantages. Below is a quick comparison table of some popular beginner-friendly options, allowing you to see how they stack up.
| Software | Price Model | Skill Level | Platform | Key Feature |
|---|---|---|---|---|
| Adobe After Effects | Subscription | Intermediate | Win, Mac | Built-in Keylight |
| DaVinci Resolve | Free (Basic), Paid | Intermediate | Win, Mac, Linux | Powerful color correction |
| HitFilm Express | Free with add-ons | Beginner-Intermediate | Win, Mac | Easy interface, robust effects |
| Final Cut Pro | One-time purchase | Intermediate | Mac | Intuitive timeline, fast renders |
| Filmora | One-time or subscription | Beginner | Win, Mac | Simple chroma key plus transitions |
Adobe After Effects (Keylight)
Adobe After Effects is popular for a reason, especially with the Keylight plugin, which enables quick and accurate green screen pulls. If you want to dig deeper, we have a resource on keying out green screens in After Effects that covers the basics and more.
DaVinci Resolve
DaVinci Resolve offers robust color correction tools, and its Fusion page has advanced keying functionalities. Resolve is well-loved for being free in its basic version, making it handy if you’re on a tight budget yet still want professional tools.
HitFilm Express
HitFilm Express is known for combining editing and VFX in one place at no cost. Their interface is user-friendly, and you can buy add-ons for more advanced features. It’s a great bridge between beginner-level software and professional-tier programs.
Final Cut Pro
If you’re a Mac user and prefer a one-time purchase over subscriptions, Final Cut Pro is a strong choice. It comes with a streamlined chroma keyer that’s perfect for quick-turnaround projects or short films. With some practice, you’ll achieve high-quality results without needing to delve too deeply into advanced menus.
Filmora
Filmora is designed for beginners who need a straightforward video editing tool. Its chroma key feature is easy to use, although it doesn’t offer the same depth as software like Adobe After Effects. Still, if you’re starting and learning the ropes, Filmora’s simplicity can be a significant advantage.
Master essential keying steps
Regardless of the software, the key to stellar composites often involves the same steps:
- Shoot solid footage: Aim for even lighting on your green screen, and ensure there’s sufficient distance between your subject and the background to minimize spill. Our green screen lighting setup post has more details on how to achieve a clean backdrop.
- Apply the key effect: Use your software’s chroma key or color key feature to remove the green. Adobe users may rely on Keylight, while DaVinci Resolve users may turn to Fusion. This is where you’ll pull out the background color and start tweaking the edges.
- Fine-tune edges and matte: Adjust the ‘sclip’s black or ‘swhite levels (or similar settings) so that your subject is crisp with solid edges. Don’t rush this step—it’s essential for getting a professional finish.
- Manage spills: Green spills often appear around hair or on shiny surfaces. Most software provides a spill suppression feature that neutralizes leftover green. Using it properly prevents your actor from looking like they’ve just walked off a sci-fi set.
- Refine and composite: After ensuring your key is solid, add a new background or environment under your keyed footage. Ensure the lighting and color palette are consistent. For a deep dive into advanced compositing, see our Green Screen Compositing tutorial.
Optimize your final composite.
Once you’ve locked in your key, it’s time for those subtle tweaks that give your shot that “guess what, it’s real” vibe:
- Color correction: If your subject appears too bright or dim compared to the new background, adjust your color and exposure levels accordingly. This helps merge the subject seamlessly.
- Light matching: If there’s directional lighting in your background plate, mimic that by adding a subtle digital “light wrap” or rim light to your keyed subject.
- Additional masking: Garbage mattes or masks are extremely useful for removing stray green edges or set equipment. Creating a simple shape that isolates your subject can solve a world of trouble.
- Motion tracking: If your background is moving (think camera pans or handheld footage), you’ll want to track those movements so your keyed subject aligns perfectly.
If this stage feels intimidating, don’t worry. Everyone started from scratch. With consistent practice and the right resources, you’ll become more comfortable. Feel free to explore further professional keying techniques for advanced methods.
Conclusion and next steps
Choosing the best green screen keying software isn’t just about brand names; it’s also about functionality. It’s about how each tool aligns with your budget, your skill level, and your creative aspirations. Whether you opt for the built-in Keylight in After Effects, the free capabilities in DaVinci Resolve, or a simpler program like Filmora, the power is at your fingertips to create impressive composites.
Start by nailing your green screen capture. A properly lit shot saves time in post and helps your keying software work its magic. From there, practice is your best friend. Tweak your matte, control spill, match your lighting, and keep an eye on small details.
Seriously, once you understand the nuances, you’ll be able to craft visuals that make your audience do a double-take. And that’s the goal: realistic composites that effortlessly blend your subject into any scene you dream up. So get out there, load up your chosen software, and let your creativity shine. Big shout-out to you for your green screen artistry—now let’s see what you can create!
FAQS – Frequently Asked Questions
1. What is the best green screen keying software?
The best green screen keying software often includes industry favorites like Adobe After Effects, Boris FX Optics, and Blackmagic Fusion.
2. What features should I look for in the best green screen keying software?
Look for spill suppression, edge refinement, color tolerance, and real-time preview in the best green screen keying software.
3. Is free software included in the best green screen keying software list?
Yes—free tools like Blender’s keyer and DaVinci Resolve are often considered among the best green screen keying software for budget workflows.
4. How do I choose the best green screen keying software for beginners?
For beginners, the best green screen keying software offers intuitive UI, presets, and tutorials—like Resolve’s Fusion tab or After Effects Keylight.
5. Can the best green screen keying software handle motion blur?
The best green screen keying software includes advanced motion blur handling and temporal smoothing to maintain clean keys in dynamic footage.
6. Is real-time preview important in the best green screen keying software?
Yes—real-time preview is essential, and some of the best green screen keying software like Resolve’s Fusion offer live feedback.
7. Do I need GPU acceleration in the best green screen keying software?
GPU acceleration speeds up rendering and is a key feature in many of the best green screen keying software solutions today.
8. What platform compatibility is offered by the best green screen keying software?
Top green screen keying software supports Windows, macOS, and often Linux—ensuring cross-platform versatility.
9. Can the best green screen keying software support HDR footage?
Yes, many of the best green screen keying software support HDR/LOG input for high dynamic range compositing.
10. Is After Effects considered the best green screen keying software?
Adobe After Effects with Keylight is widely regarded as one of the best green screen keying software due to its precise controls and integration.
11. What free green screen keying software ranks among the best?
Free options like Blender’s keyer and DaVinci Resolve are counted among the best green screen keying software by many editors.
12. How does lighting affect the performance of the best green screen keying software?
Even with top-tier keying tools, the best green screen keying software performs optimally with good lighting and well-prepped backgrounds.
13. Do I need plugins for the best green screen keying software?
Plugins like Red Giant Magic Bullet or Primatte Studio can enhance capabilities, making them some of the best green screen keying software combos.
14. Can the best green screen keying software handle edge spill automatically?
Yes—automatic edge spill suppression is a feature found in the best green screen keying software for clean compositing.
15. How much does the best green screen keying software cost?
Costs range—After Effects is subscription-based, Fusion is free in Resolve, and standalone tools vary, all categorised among the best green screen keying software.
16. Are there mobile versions of the best green screen keying software?
Some best green screen keying software have mobile-friendly versions, but desktop tools like Resolve and AE remain industry standard.
17. Is ease of use a feature of the best green screen keying software?
Yes—intuitive controls and presets make certain tools stand out as the best green screen keying software for quick setups.
18. How do updates influence the best green screen keying software?
Regular updates with AI-driven tools and improved keying algorithms help maintain a title as the best green screen keying software.
19. Can the best green screen keying software handle extreme green spill?
Advanced keyers within the best green screen keying software include spill suppression and matte refinement to manage spill edges.
20. How do I compare the best green screen keying software?
Compare features like spill removal, edge refinement, GPU support, supported formats, and cost when selecting the best green screen keying software.
21. Where can I learn to use the best green screen keying software?
Online tutorials, official documentation, and VFX communities provide guides to master the best green screen keying software.