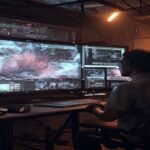


If you’re looking to revolutionize your film projects with 3d depth creation techniques, you’ve come to the right place. By adding authentic depth and dimensionality to your scenes, you invite your audience to experience your work in a fresh, immersive way. When done right, stereoscopic effects go beyond mere novelty, giving viewers an exciting sense of presence. If you’ve ever tried to set up a 3D shot and ended up with cross-eyed test audiences… yeah, I’ve been there too. Let’s fix that together.
Understand stereo vision basics
Before you dig into setup, it helps to grasp the core principle of stereo vision: each eye sees a slightly different image, and your brain merges them into a singular three-dimensional perception. In visual effects, you replicate that disparity digitally. You basically feed each eye a slightly off-angle view, so your audience’s brain is tricked into seeing genuine depth.
1The concept behind parallax
Parallax shifts occur when background objects move more slowly in the frame than foreground objects. That difference in apparent motion between layers of your image is key to creating a believable 3D effect. Whenever you shift your camera (or in post-production, replicate that shift), you’re introducing parallax. This is where it’s super important to ensure each layer looks and feels distinct.
2Common pitfalls to avoid
- Using identical views for both eyes. That leads to a flat image, so try to offset your camera rigs slightly, or simulate that shift in your compositing software.
- Overdoing the separation. Too much disparity can feel disorienting, with viewers complaining of headaches or double vision. Take it slow and tweak as needed.
- Forgetting natural scale. An exaggerated scale might make objects look miniature or comedic if the stereo shift doesn’t match realistic human vision.
Set up your 3D camera
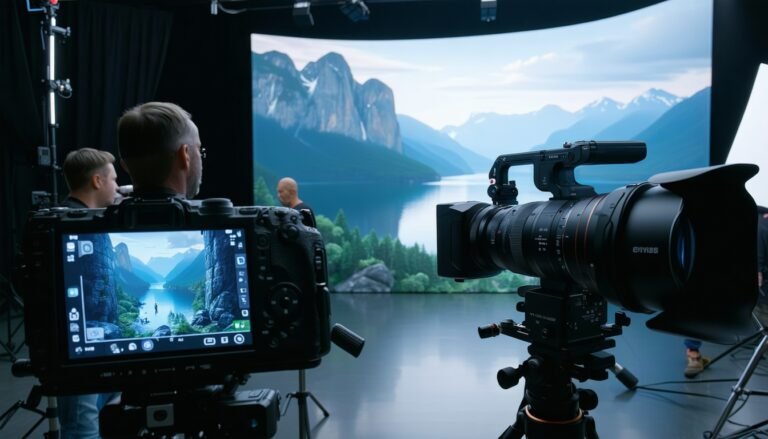
Your core 3D camera rig might include two physical cameras (for live-action) or two virtual cameras in 3D software. Think of each camera as one eye. Once you start adjusting angles and distances, you’ll see how the magic happens. However, camera alignment can be a touchy subject for first-timers, so handle it with care.
3Parallel vs toed-in approach
- Parallel: Both cameras are pointed straight ahead, perfectly parallel to each other. This approach is often simpler, but you’ll rely on software to converge the images.
- Toed-in: Both cameras angle slightly inward at a point you choose to be “in focus.” This can work well if your main subject is always in roughly the same spot, but watch out for distortions on the edges.
Use depth mapping methods
To create stereo illusions in post, you can employ manual or automated depth mapping. By layering fore, mid, and backgrounds separately, you can sculpt how your viewer perceives distance—even if your footage started out flat.
4Layer-based compositing
If you’re working with 2D shots, you might try a layer-based approach. Isolate your foreground action, then push the background backward (and vice versa) with a depth map. This approach is a cornerstone of depth mapping in filmmaking, and it ensures each layer is correctly placed in the scene.
- Separate your subject by rotoscoping or masking.
- Assign different grayscale values for each layer (darker = closer, lighter = farther).
- Feed that map into a 3D compositing program that can interpret it for stereoscopic output.
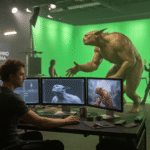
5Advanced software techniques
🎓 Want to Master This Skill?
Join 10,000+ students at VFX India — Industry-standard training in Chennai with 100% placement.
🚀 Enroll Now💬 WhatsAppMany VFX artists rely on specialized software to handle stereoscopic complexities. These offer:
- Automatic parallax adjustment tools
- Real-time preview of left-eye and right-eye feeds
- Integration with your favorite editing suites
If you want to grow beyond the basics, advanced stereoscopic filmmaking can take your depth creation to the next level. You’ll juggle convergence points, vertical alignment, and image warping to produce sleek, show-stopping visuals.
Enhance your stereoscopic shots
Once your base layers are sorted, it’s time to get nitpicky with alignment, convergence, and color. This is the step that often makes or breaks the realism of your shot. Even a minor misalignment can have your audience tilting their heads in confusion, so treat your final passes with precision.
6Convergence and alignment tips
- Align key points: Make sure objects meant to appear “on the screen plane” line up perfectly in both eyes.
- Adjust convergence carefully: Decide where you want the main subject to appear in relation to the screen (behind it, in front of it, or right on it). Then fine-tune until it feels comfortable to watch.
- Check vertical alignment: If you see a noticeable vertical mismatch between the left and right images, correct it before final output.
7Tackle color and brightness
Slight color differences or mismatched brightness between your two camera feeds can ruin the illusion. Keep an eye on shadows and highlights—if one side is darker, your viewers might sense something “off.” In digital workflows, treat both eyes with the same color correction or use symmetrical nodes. Also, keep an eye on how your final footage compares to known references of vfx for 3d movies.
Polish and release
You’re almost there. Sorting out convergence is only half the battle. You want to ensure your final product feels good whether audience members are using active 3D glasses, passive polarized glasses, or VR headsets. The final step involves general housekeeping, tidy-ups, and the all-important test screenings.
8Check your final output
Try playing back your final stereo footage in various environments. Watch how your 3D effect changes in bright daylight, a dimly lit studio, or on different screens. If something looks a bit extreme or underwhelming, circle back and tweak your parallax settings.
- Conduct a brief “stress test” on multiple devices.
- Ask peers or mentors to view the footage in a calibrated environment.
- Compare to known exemplars of stereoscopic effects in movies to see if your depth layering stands out.
9Next steps to explore
3D artistry is an ever-evolving landscape. Once you feel comfortable with these fundamentals, expand your toolkit to include motion-tracking data for advanced composites. You might also explore using volumetric capture or full 3D CGI integrations that let you craft scenes from scratch. If you find yourself hooked on pushing boundaries, there’s an open world of new technology waiting, from holographic displays to AR environments.
Ultimately, it’s all about experimenting until you find the style that resonates with you and your audience. With practice, you’ll not only master the process, but you’ll also start breathing new life into every scene, turning ordinary footage into an immersive 3D experience. If that’s not worth a big “thank you” to yourself and your team, I don’t know what is!
FAQS – Frequently Asked Questions
What are 3D depth creation techniques in visual design?
3D depth creation techniques in visual design involve using lighting, shading, layering, and spatial relationships to simulate three-dimensional space in 2D or 3D environments.
Which software is best for 3D depth creation techniques?
Blender, Cinema 4D, Autodesk Maya, 3ds Max, and Adobe After Effects are among the most popular tools used to implement 3D depth creation techniques in professional workflows.
How does parallax scrolling contribute to 3D depth creation techniques?
Parallax scrolling is a key 3D depth creation technique where background and foreground elements move at different speeds, creating the illusion of layered depth in animation or web design.
What is the difference between z-depth and depth of field in 3D design?
Z-depth is a technical 3D depth creation technique that maps object distance, while depth of field blurs distant or near elements to mimic how a camera focuses in real life.
Can lighting enhance 3D depth creation techniques?
Yes, directional lighting, ambient occlusion, and shadows are essential 3D depth creation techniques that add realism and help establish spatial hierarchy in a scene.
What is stereoscopic 3D in 3D depth creation techniques?
Stereoscopic 3D is a method within 3D depth creation techniques where two offset images are shown to each eye, creating a strong perception of depth through binocular disparity.
How does perspective drawing relate to 3D depth creation techniques?
Perspective drawing is one of the oldest 3D depth creation techniques, using vanishing points and scaling to simulate how objects appear smaller as they recede into space.
Are 2D layers effective for 3D depth creation techniques?
Yes, 2D layers can simulate depth using scale, motion, and blur. Software like After Effects applies 3D depth creation techniques on 2D assets using a virtual camera system.
What is a depth map in 3D depth creation techniques?
A depth map is a grayscale image used in 3D depth creation techniques to represent the distance of objects from the camera, helping to create realistic focus and lighting effects.
How do camera movements affect 3D depth creation?
Camera movement is crucial to 3D depth creation techniques. Zooms, pans, and orbits reveal new spatial angles and reinforce the illusion of depth in animations or renders.
What are volumetric lighting effects in 3D depth creation techniques?
Volumetric lighting adds atmosphere and dimension by simulating how light travels through space. It's a powerful technique for enhancing 3D depth in foggy or dusty scenes.
How do shadows play a role in 3D depth creation?
Shadows are fundamental in 3D depth creation techniques. They ground objects in space and define the shape and distance of elements based on light interaction.
Can textures influence 3D depth perception?
Yes, detailed textures that scale with distance are part of effective 3D depth creation techniques. They help simulate surface realism and reinforce spatial depth.
What is occlusion and why is it important in 3D depth creation?
Occlusion is when one object blocks another. It's a natural depth cue and an important part of 3D depth creation techniques to signal which objects are in front.
How are depth passes used in 3D depth creation techniques?
Depth passes store pixel distance information. They're used in 3D depth creation techniques to control post-processing effects like fog, blur, and compositing layers.
What role does focal length play in 3D depth creation?
Focal length impacts how compressed or exaggerated spatial relationships appear. Choosing the right focal length is vital in 3D depth creation techniques for realism.
How is motion used in 3D depth creation techniques?
Motion adds depth cues by simulating real-world physics. For example, foreground objects moving faster than background ones strengthens the sense of depth in 3D scenes.
What is Z-buffering in 3D depth creation techniques?
Z-buffering is a rendering technique that records object depth at each pixel. It ensures correct layering in 3D depth creation by determining what’s visible in a scene.
How does ambient occlusion enhance 3D depth?
Ambient occlusion darkens areas where surfaces are close together, enhancing 3D depth creation techniques by adding subtle realism and spatial shadowing.
Can 3D depth creation techniques be applied in VR content?
Yes, 3D depth creation techniques are essential in VR. Techniques like stereoscopy, depth maps, and layered environments build immersive virtual experiences.
Do motion blur effects help with 3D depth creation?
Motion blur suggests speed and direction, adding realism. It's a common 3D depth creation technique in animation and rendering to convey spatial dynamics.
📑 Table of Contents
Master VFX, Design & AI in Chennai
Industry-standard training with 100% job placement. Start your creative career today!
🚀 Enroll Now💬 WhatsApp Us📂 Categories
Graphic Design (49)VFX (21)Action CGI (11)Visual Effects (10)Live Action (9)Typography (9)chroma key (6)Green Screen Keying (6)Stereoscopic 3D (5)Digital Marketing (5)Visual Effects (5)SEO (5)Camera Tracking (4)3D Movie (3)AI Graphic Design (2)app Development (2)UI UX (2)Match moving (1)Web Development (1)Film Editing (1)🎯 Related Courses
📚3D Animation Course in Chennai📰 Recent Posts